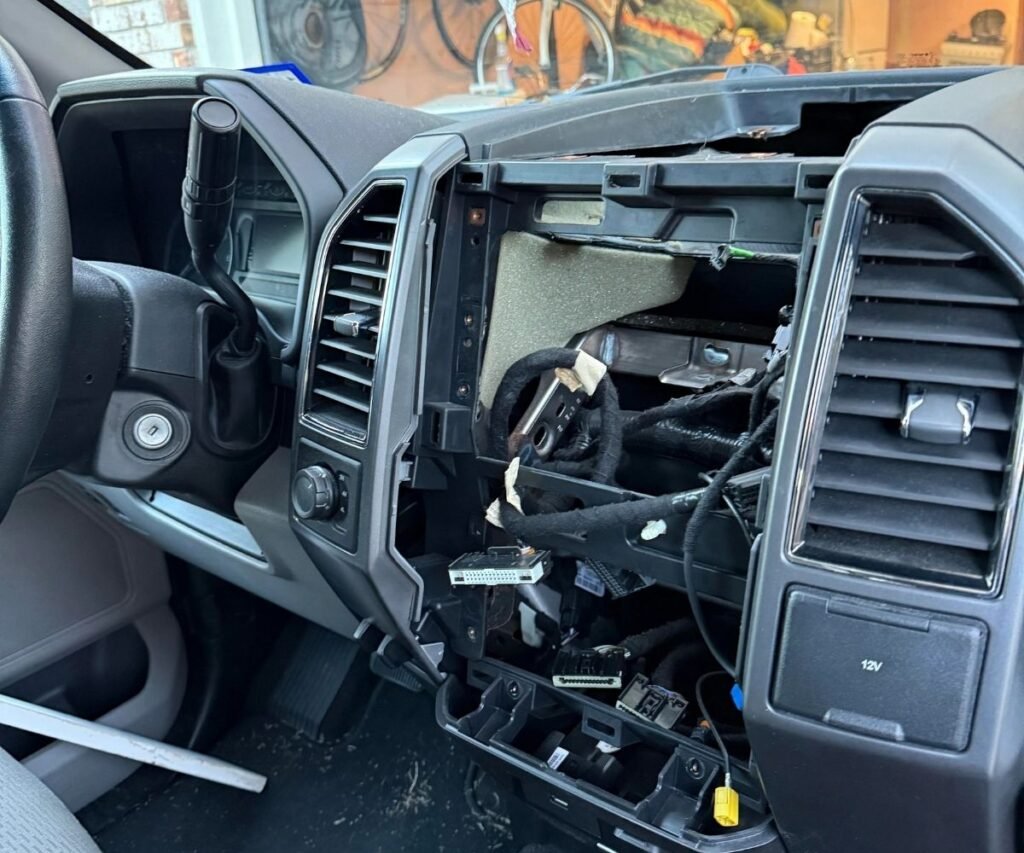
Ford F-150 (2009–2019) Installation
Guide Installing
--Haudio CVD9943-ZA Double DIN Head Unit
This guide assumes a double-DIN radio opening in the F-150 dash (standard for 2009–2019). You may need a dash kit + wiring harness adapter for a clean, secure installation.
Tools & Materials You Will Need:
Hand Tools:
Phillips screwdriver*1, Flathead screwdriver or plastic trim removal tools*1, Trim panel removal tool *1, Socket ratchet + sockets (typically 7mm and 8mm)* 1, Wire stripper/crimper * 1, Electrical tape / heat shrink * 1;
Installation Accessories
Double-DIN dash kit for Ford F-150 (09–19), Wiring harness adapter (factory to aftermarket), Antenna adapter (Ford to standard), Steering wheel control adapter (optional), Cable ties, Haudio CVD9943-ZA Components.
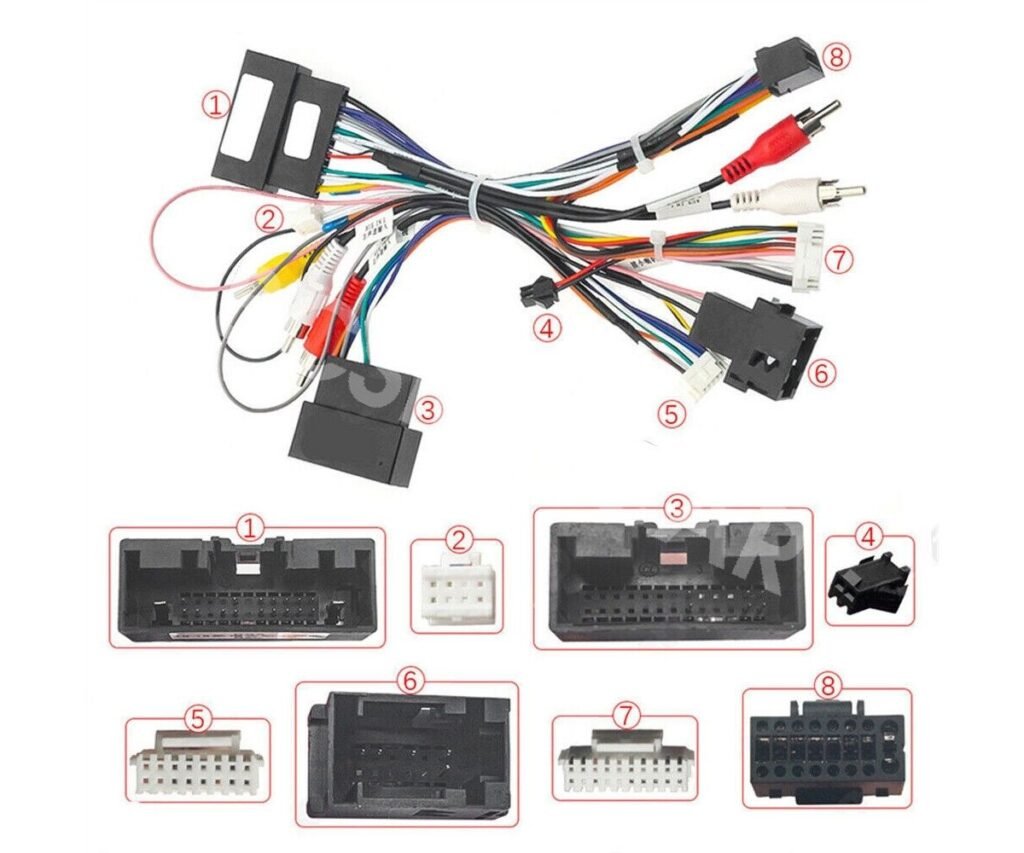
The stereo package includes:
CVD9943-ZA Car Stereo* 1; Power Cord *2;4-pin USB-S Cable *1;6-pin USB-S Cable *1;GPS Antenna *1;20-pin RCA Antenna *1;8-pin RCA Antenna *1;Mounting Screws *;User Manual *1;Brackets *2;Warranty Card *1;Rear Camera *1;Rear Camera Input;Reverse Wire *1;Cable *1
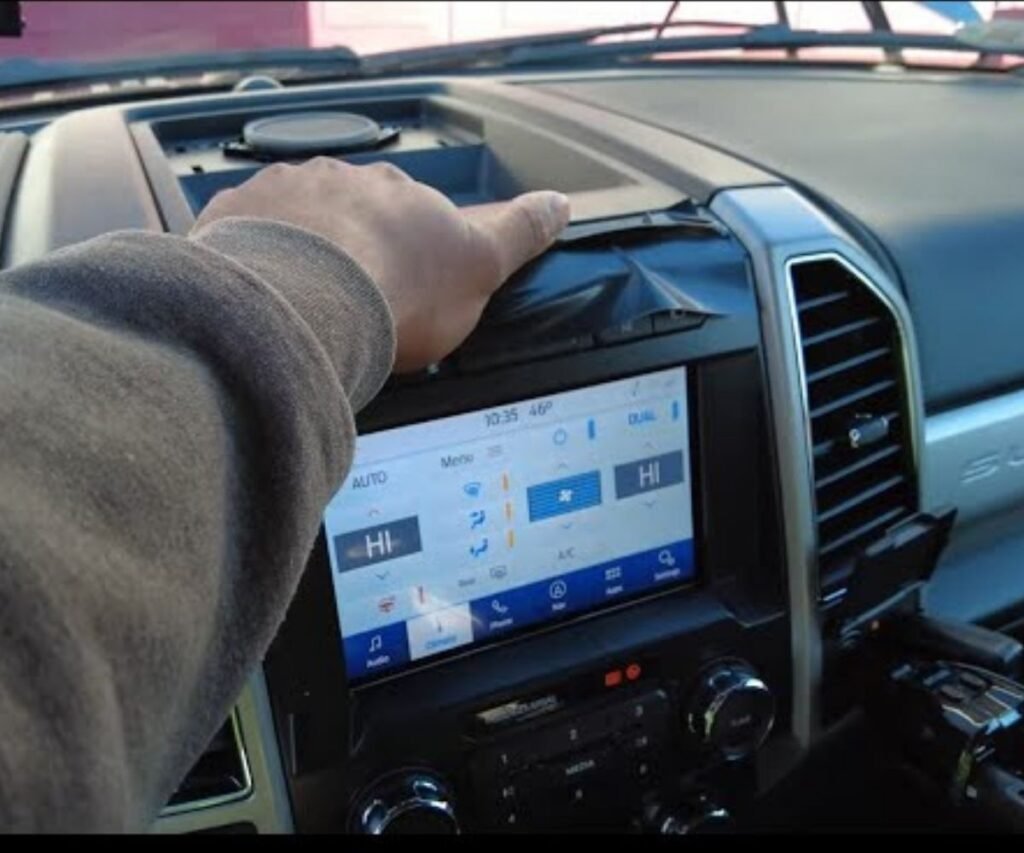
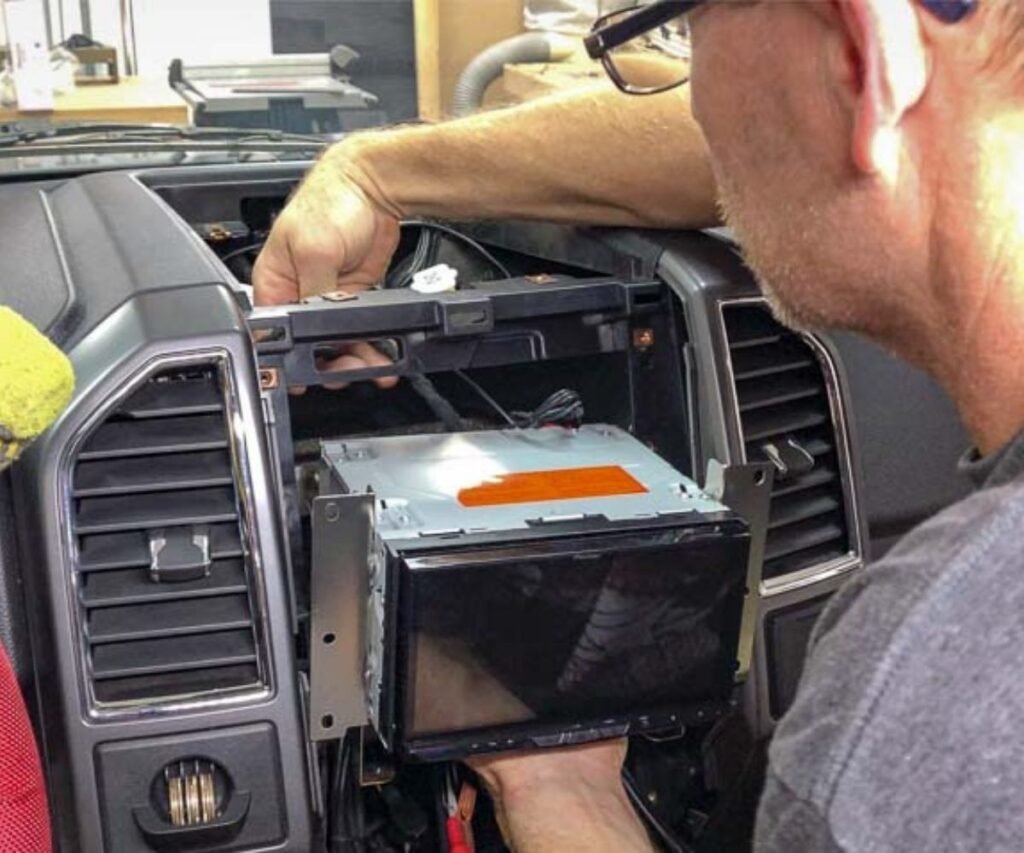
Install Step By Step
1, Safety First — Disconnect Power
- Put the truck in Park and turn the ignition OFF.
- Open the hood and disconnect the negative battery terminal. This prevents shorts and protects vehicle electronics.
2, Remove Factory Dash Trim
- Use a plastic trim tool to gently unsnap the side trim panels around the stereo area.
- Carefully peel panels outward — avoid breaking clips.
- Take your time; these panels are fragile and can crack if pried too hard.
3, Remove the Factory Head Unit
- Locate and remove screws securing the stock stereo (Ford uses Phillips or metric screws).
- Once screws are out, pull the radio forward evenly.
Unplug all connectors: Factory wiring harness, Antenna cable, Any accessory plugs (USB, AUX, etc.)
4, Prepare the Wiring
Harness Adapter: You should use a Ford-to-aftermarket wiring harness adapter so you don’t cut factory wires.
Match color-coded wires:
- Red = ignition power
- Yellow = constant power
- Black = ground
Speakers = grouped in pairs
Secure connections with crimp connectors or solder + heat shrink.
Antenna Adapter: Connect the Ford antenna through a Ford antenna adapter to the Haudio unit.
Optional: Steering Wheel Controls: If your F-150 has steering controls and you want to retain them, a SWC interface is highly recommended.
5, Mounting the Haudio Unit
- Attach mounting brackets included with the stereo onto the CVD9943-ZA unit.
- Insert the stereo into the double-DIN dash kit frame.
- Place the assembled dash kit + head unit into the dash opening.
- Secure with the factory mounting points or provided screws.
6, Reconnect Wiring
From back of the Haudio:
- Plug harness adapter into unit and vehicle harness
- Connect antenna adapter
- GPS antenna — route up toward the windshield for best reception.
- Rear camera — connect cable to camera input; run reverse trigger wire to reverse light circuit.
- Connect USB and auxiliary cables as desired.
- Make sure all connections are snug and secure.
7, Test Before Final Assembly
Reconnect the negative battery terminal.Turn the vehicle on and verify:
- Unit powers up
- Touchscreen responds
- CarPlay/Android Auto works
- GPS receives signal
- Reverse camera engages when in Reverse
- Audio plays and steering control buttons (if connected) work
If anything doesn’t work, turn the vehicle OFF before adjusting wiring.
8, Reassemble the Dash
Once testing is successful:
- Carefully reinstall the dash trim panels.
- Press each clip gently until you hear a snap — do this evenly to avoid misalignment.
- Ensure all panels are flush and secure.
Tips & Best Practices
- Dash Kit Matters: A good dash kit for the F-150 ensures a factory-like fit and avoids gaps. Some kits even retain HVAC controls while allowing double DIN units.
Sound of Tri-State - Harness Adapter Saves Trouble: Using a wiring adapter preserves the original Ford wiring and can easily be reversed if needed.
- Camera Trigger Wire: Connect the reverse trigger wire to the truck’s reverse light circuit. This makes the screen automatically switch to the backup camera when backing up.
- Avoid Sharp Wire Bends:Route cables cleanly and secure with cable ties to avoid rattles and possible damage.
- Always Test Before Final Reassembly
By completing this install, you have equipped your F-150 with a modern Android 13 system featuring:
- Wireless Apple CarPlay & Android Auto
- Navigation GPS
- DSP audio tuning
- Bluetooth & Wi-Fi connectivity
- Backup camera support
- Steering wheel control support (if adapter used)
CVD9943-ZA
- CarPlay, Android Auto & MirrorLink
- Octa-Core Processor
- GPS Navigation
- Advanced DSP, EQ & ASP Audio Settings
- Voice Control Support
- 720P AHD Rearview Camera
- Bluetooth 5.1 & WiFi 6
- FM, AM & RDS Radio Support
- Split-Screen Multitasking Mode
